How to Make a Shirt With Cricut? [Step-by-Step Guide]
Apart from making custom projects, DIYers also prefer Cricut for designing custom shirts of various sizes, patterns & colors. It helps them show their creativity skills by drawing their ideas into the Cricut Design Space app. These days, personal shirts are in trend among teenagers, boosting the crafter to create more.
Other than that, they can also design this outfit by gifting them to their friends or family members. Many people choose a custom shirt while hosting an event, making their guests wear the outfit, too. In order to create a personal shirt, all the DIYers should have mandatory supplies by their side. Scroll down this blog and learn how to make a shirt with Cricut.
Materials Needed to Create Cricut Shirt
It’s crystal clear that without the bundle of materials, designing a custom shirt won’t be possible. If you are confused about which correct materials you should buy, then refer to the following pointers:
- Cricut Explore Air 2.
- Design Space Account (Cricut Access subscription).
- Shirt Blank.
- Cutting Mat.
- Weeding Tool.
- CricutEasy Press 2
- Lint Roller.
- Heat Resistant Tape.
After collecting all these materials, all the DIYers must be very cautious while designing the shirt.
Step 1: Draw a Design on the Cricut App
- Start the process by logging into the Cricut Design Space app using login details.
- Now, tick the Templates available under the Menu bar.
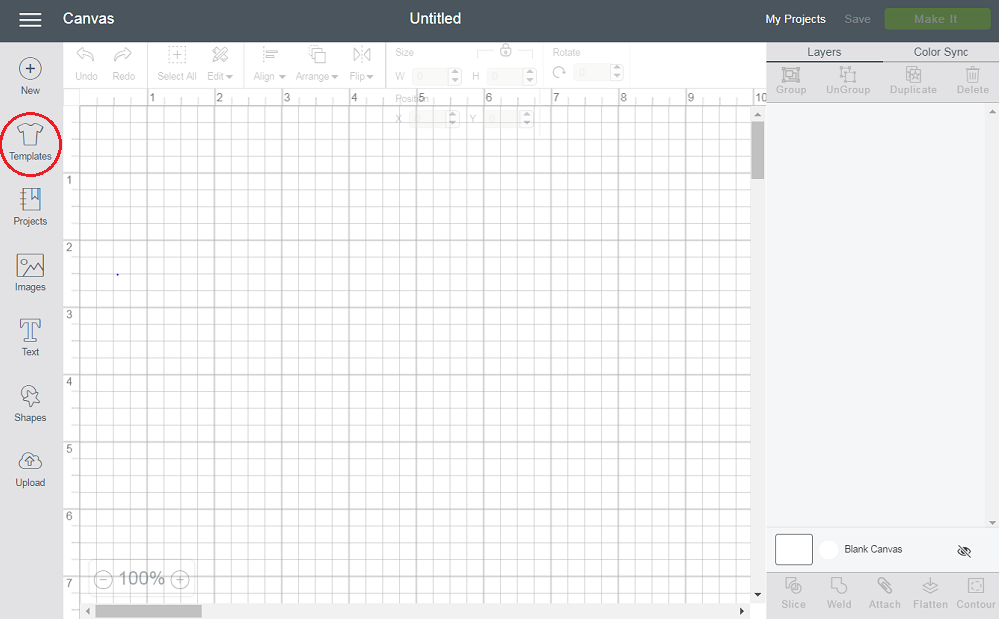
- At the Templates page, select your shirt type & shirt as per your choice.
- Next, select the Image/Text/Shape tool to insert text, image, or shape on the shirt.
- Following this, resize the image or make common changes if needed and proceed towards the next step.
Step 2: Cut Out the Design
- After finishing up the drawn design, press the Make It button appearing on the top-right side of the Canvas.
- At the mat preview screen, enable the Mirror option and switch on your Cricut machine.
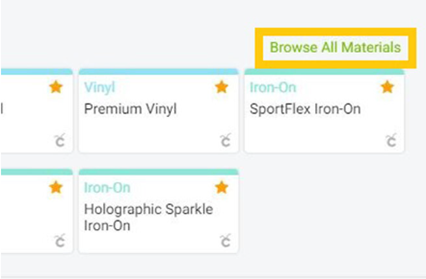
- On the new web screen, tick the Browse All Materials, and after selecting the material, press the Done button.
- Following this, gently unpack the material and place it on the Cricut cutting mat.
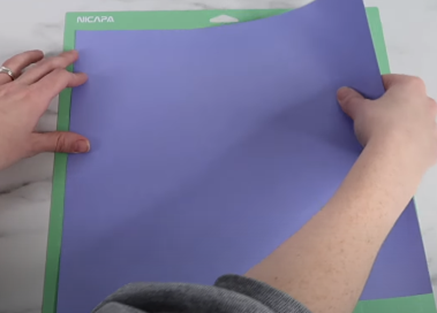
- Next, apply the material equally on the mat via a scraper tool or brayer tool.
- Now, load the material into the cutter and press the Cricut flashing icon to start cutting.
- After the cut comes to an end, unload the material and use a weeder tool to remove the extra design from the mat.
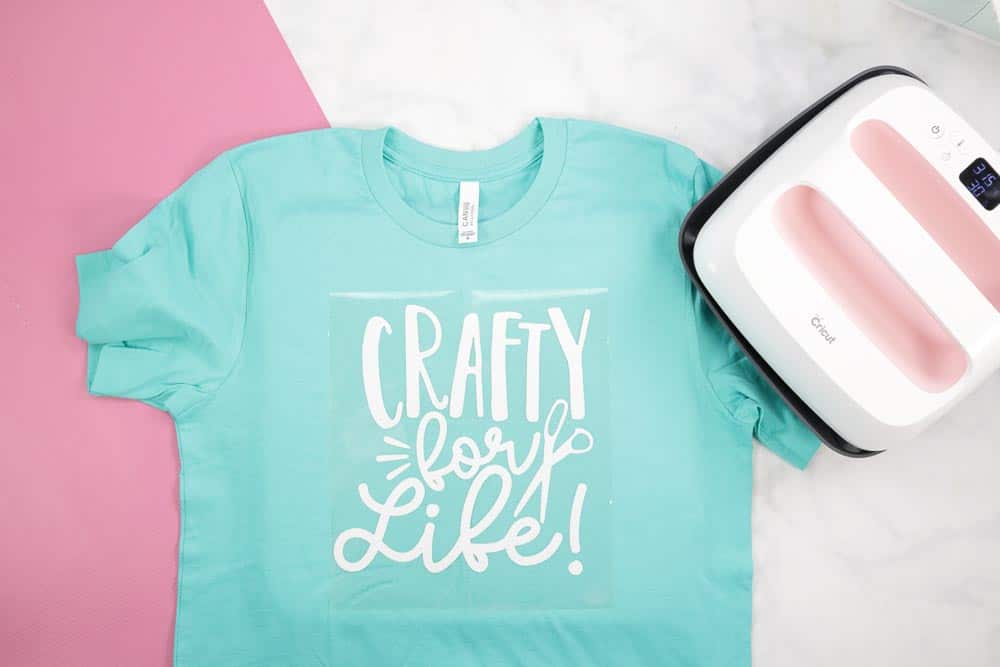
Step 3: Apply the Design on Shirt Blank
- Take a lint roller and clean the shirt to remove fluffy or loose fibers from the shirt.
- Now, place the weeded designs on the decided shirt and try not to overlap them.
- You can also use heat-resistant tape to prevent the design from moving during the heating process.
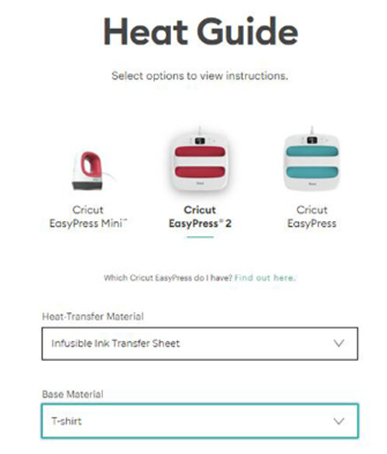
- Now, open the Heat Guide, choose your Heat Press, and choose the Base Material & Heat-Transfer Material.
- Follow the on-screen instructions, ensuring that the press covers the whole design while pressing.
- After the pressing is complete, let the material cool down before removing it.
- Once all the materials cool down, it’s time to try and get ready to wear it for various events.

After coming across how to make a shirt with Cricut above-said steps, you must be feeling pretty confident. Keep designing new shirts on the electronic cutting machine to brush up on your artistic skills.
Frequently Asked Questions
Question: Can I Sell Shirts Designed With Cricut?
Answer: The answer is yes! The crafter can not only create but also sell shirts made with Cricut. They just need to buy a compatible cut-die machine along with vital supplies needed during the designing process. However, before selling the custom shirts, all the DIYers need to ensure that they’ve bought the correct supplies, which will provide them with the final shirt as per their expectation.
Question: How Long Does a Cricut Shirt Last?
Answer: It doesn’t matter which material has been chosen by the crafter while designing the shirt. If taken care of properly, the Cricut shirt lasts up to 50 washes. Before washing the shirt, it should be turned inside out to protect the design from getting damaged after washing. On the contrary, it should be washed with a soft liquid detergent with soft hands and shouldn’t get bleached.
Question: Is It Easy to Make Custom Shirts With Cricut?
Answer: With an electronic cutting machine, it is very simple to design a custom shirt, as users need to take a few steps to create the shirt. Apart from that, the Design Space app draws the design as per the command given to them. After that, the design is shared with the craft plotter, and the outfit is completed as expected.
Source URL :- How to Make a Shirt With Cricut?
Visit Site :- design.cricut.com/setup


Comments
Post a Comment