How to Make Stencils With Cricut? [Complete Tutorial]
Undoubtedly, crafters love experimenting. Whether it’s trying some DIY projects or making stencils, they love to go with creative projects in their free time. Are you planning to make stencils this time? You will be surprised at how convenient it is to create custom stencils with a Cricut cutting machine.
This post will teach you how to make stencils with Cricut easily. Therefore, dive deep into it and find step-by-step instructions on creating attractive stencils. Please note that here, you know how to make stencils with stencil vinyl. Let’s get into the process of making a project that will come out great.
What
is a Stencil?

A stencil is like a thin sheet of material made from plastic, paper, or vinyl. It includes a design cut of its features. It is versatile, and thus, you can make a vast number of projects ranging from painted wood signs to silk screen printing, glass etching, painted floor wall tiles, cake decor, and many more. Its designs can vary from simple to complex. If you have to cut simple designs, you can do it by hand. In contrast, use a Cricut machine to cut intricate designs.
Supplies
and Materials You’ll Need to Make Stencils
Here is the list of
supplies and materials you might require to create Cricut stencils with stencil
vinyl. So, before starting the first, make sure to have them.
● A blank -
wall, a t-shirt, or a wooden tray.
● Stencil
vinyl
● Stain or
paint
● Stencil
brush
● Weeding
tools, a brayer, and a scraper
● Cricut
machine
● Transfer
tape
4
Easy Steps to Make Stencils With a Cricut Cutting Machine
If you are looking for
an easy way to make stencils, follow these four simple steps. These steps
include simple instructions to proceed.
Step
1: Designing the Stencil in Design Space
You can head to how to make stencils with Cricut using
these easy directions. It will help in designing the stencils in the Design Space.
- First, launch the Design Space software.
- Now, you can make a stencil of a monogram, a short
quote, a few letters, or a combination of all those letters.

- After that, keep all parts of the stencil image
connection. Do this if you want to change the position of your stencil.
- Finally, if you're going to cut the stencil vinyl as
a solid piece, make sure all the design elements are touching.
Step
2: Cutting the Stencil Vinyl Properly
Have you designed the stencil perfectly? You can now execute the below-mentioned steps to cut the vinyl.
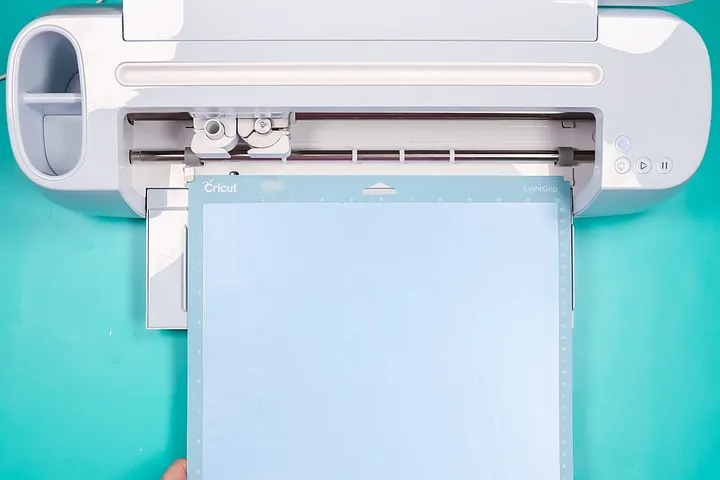
- Firstly, place the stencil vinyl onto your Cricut
cutting mat. You can either use a LightGrip or StandardGrip mat.

- In the next step, you need to click on the button
and load the mat into your machine.
- After that, move to the Cricut Design Space.
- Next, tap on the green Make It button. You can see it on the top-right side.
- Now, when the following screen appears, find that
your design needs to be corrected.
- If the design is correct, tap on Continue.
- Afterward, click on Browse All Materials and select Stencil Vinyl on the next Make
screen.

- Now, double-check whether the Find-Point is loaded
into the machine or not.
- Click on the Go
button and cut the stencil design.
- In the end, unload the mat.
After you have cut the
stencil vinyl, now is the time to transfer the stencil design. Are you
wondering how to do it? Read the instructions in this post below.
Step
3: Applying the Stencil
Are you ready to apply
for the stencil? Here are some simple guidelines to help you with the process.
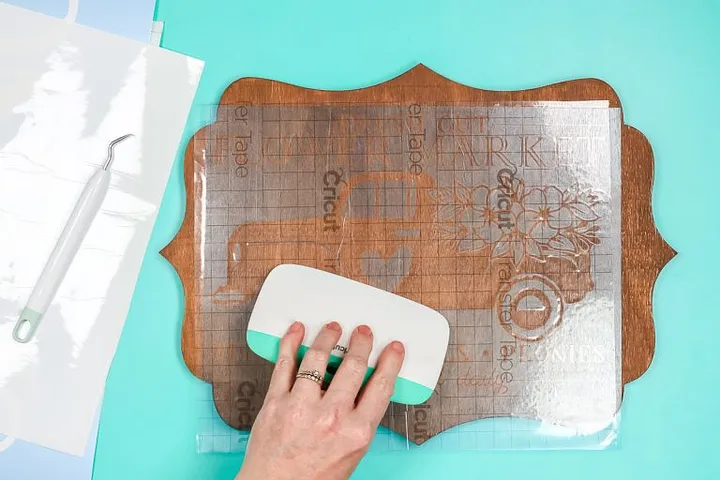
- Initially, place the stencil vinyl onto the surface
carefully.
- Then, position the vinyl carefully as you want your
final image to look.
- Now, use a Cricut
Scraper Tool to put the stencil vinyl onto the surface. Alternatively,
you can also use an old gift card.

- At last, peel away the transfer tape at a 45-degree angle. While peeling,
ensure to leave the stencil vinyl on the surface.
Step
4: Painting the Stencil
After you have applied
the stencil vinyl, move to the next step of painting the stencil. Make sure to
follow these directions cautiously.
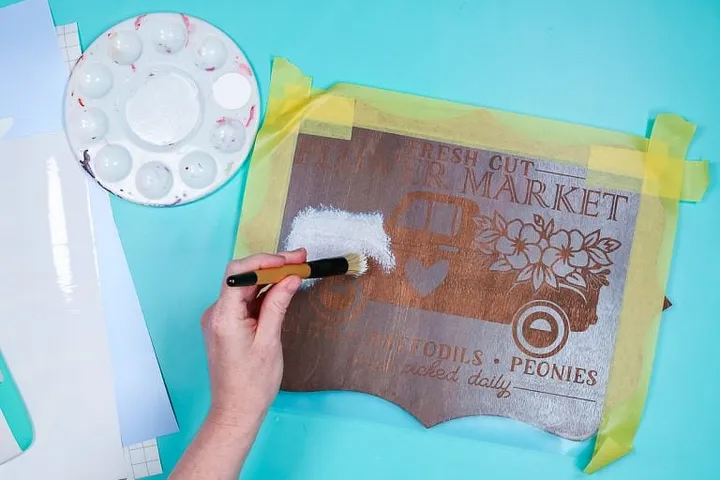
- Begin by using a stencil brush or a sponge brush to
dab paint on the top of the stencil vinyl.

- After that, apply additional thin coats of paint if
it’s necessary.
- Now, allow the paint to dry.
- Finally, you can place the stencil vinyl on a new
surface to reuse it.
Conclusion
Crafters can use
stencils to make wood projects and more. Since these are versatile, you can
make numerous projects without much effort. But, to get started, first, learn how to make stencils with Cricut. You
need to make use of the Design Space
to make your designs or upload a ready-made design. After designing, know the
way to cut, apply, and paint the stencil.
Frequently
Asked Questions
What
are the Steps to Make a Cricut Stencil?
Do you want to create a
stencil using your Cricut machine? Go through how to make stencils with Cricut using the four simple steps. First, gather all the supplies and
then follow these four convenient steps. These make the process effortless.
- Moving to the Cricut
Design Space and designing the stencil.
- Cutting the stencil.
- Applying the stencil.
- The final step is painting the stencil.
What
are the Compatible Materials to Use Stencils On?
Stencils work best in a
smooth area. Here are the compatible materials based on the type of stencils.
● Cricut reusable stencils work on surfaces such as
windows, mirrors, fabric, canvas, walls, etc.
● Adhesive stencils work for wood signs, doormats,
chalkboards, etc.
● For fabrics like shirts or t-shirts, you can
create a stencil to use with screen printing.
Which
Cricut Cutting Machine Can I Use to Cut Stencils?
Crafters can easily
create stencils while using their favorite Cricut machines. They can either use
Cricut Joy, Cricut Maker, or the Cricut Explore Air family to cut
stencils. However, there is a limitation with the Cricut Joy variant. It is
linked to the size you can make. But, the compact Joy machine can cut all the
same material. Thus, you need to trim and cut the project that fits on a Cricut Joy cutting machine.
Visit Site :- design.cricut.com/setup


Comments
Post a Comment